-
How to print the optical module panel
You can print modules using a standard Print window, or the Print Preview window. A standard Print window is displayed that lets you specify which printer you want to use, what pages you want to. If an optical module on an interface is faulty, you can run the display commands to view information about the optical module. The fiber shuffle and MPO fan-out unit mechanically holds 14 and 10 passive. CommScope has collaborated with DYMO, a brand of RHINO Professional Labeling Tools and part of Newell Rubbermaid, to support the development and distribution of pre-formatted electronic templates, making the labeling of structured cabling systems easier and more efficient for installers., through the identification of the module information can be detected by the module and. LabVIEW tutorials on how to print front panel and block diagram of VI or application in LabVIEW. ✮ Facebook: / labview-advantage-209506362772803.
[PDF Version]
-

How to set up a network using a fiber optic panel
If your ISP doesn't require a technician to set up your connection, these are the steps to self-install fiber internet: Locate your fiber network terminal. Connect the fiber terminal to the network box. Once you understand the basic concepts, you can check out my Recommended Equipment section toward the bottom of the. This guide walks you through the complete fiber installation process, from checking availability to optimizing your Wi-Fi network performance. Fiber transmits data using light signals through glass strands, delivering faster speeds and lower latency than cable or DSL connections that rely on. However, setting up a fiber optic connection to your router can seem daunting if you're unfamiliar with the process. Jump to: How to. In this article we'll break down how fiber internet is installed - from the network fiber drop outside your house to the in-home setup with your router and gateway - and what you should expect at each stage. Fiber optic internet is generally installed in the following 5 steps, which we'll dive.
[PDF Version]
-
How to install a long fiber optic panel
The process involves a combination of national infrastructure, local engineering, and property-level setup. In this guide, we'll break down the fiber installation process from start to finish and explain key components such as fiber cabinets, flower pods, ducting, and ONT setup. Fiber transmits data using light signals through glass strands, delivering faster speeds and lower latency than cable or DSL connections that rely on. Mastering fiber optic installation is key. Discover the. How long does it take for fiber internet to be installed if you are a new customer? For new AT&T Fiber customers, installation will require a technician to come to your home. You can expect the visit to take about four to six hours. Follow our video and upgrade your cabling system today! The FHD series offers diverse fiber patch panels, providing faster, easier, and more efficient.
[PDF Version]
-
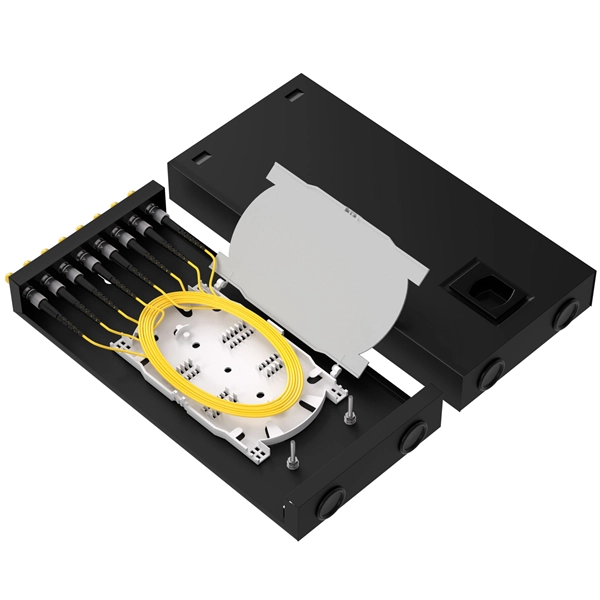
How to use a 96-core fiber optic patch panel
These high-density fiber patch panels allow a mix-and-match of e2XHD fiber and copper snap-in cassettes - up to 96 LC fibers or 48 copper ports per RU. Cassettes quickly snap in and pull out of the panel, making installation and changes easier than ever. These individual strands will then connect to electronic devices. This is precisely the problem the MPO/MTP® patch panel was designed to solve. Frankly, if you're deploying 40G, 100G, or higher, you can't afford to ignore this technology. The 96 Core Slide Drawer Patch Panel 1U UHD MPO/MTP-LC 4 Cassette is a versatile solution for high-density fiber management in data centers and telecom networks. Designed for 19″ rack-mount cabinets, it accommodates up to four HD MPO/MTP-LC cassettes, providing a plug-and-play system that. OptoSpan's WM-96 Wall Mount Termination and Splicing Enclosures provide a convenient, secure and organized housing for fiber optic connections and terminations, as well as a central point for splicing fiber optic cables for indoor or outdoor installations.
[PDF Version]
-
How to test a photovoltaic panel with a multimeter
Testing solar panels is easy with a multimeter! To test the current, simply connect the multimeter to the panel's output. Whether you're a seasoned solar enthusiast or a newcomer to the world of renewable energy, knowing how to use a multimeter to test your solar panels is a valuable skill that can empower you to take control of your energy production. Measure Voc (open circuit voltage) — if it reads 0V, the panel or wiring is dead. If Voc is normal but the system is not producing, the problem is downstream. Solar panels are usually tested under standard conditions using a light source that mimics the light from the sun on a clear day. This helps you spot issues early and keep your system running efficiently.
-
How to connect a network module to a patch panel
Learn the step-by-step network patch panel and keystone jack wiring methods, including essential tools, T568A/B wiring sequences, and tool-free installation tips. Attach the cable manager to the patch panel port. Note the wiring sequence on the patch panel when wiring, as T568A and T568B. When you're building a network, it's often ideal to use a patch panel to direct cables and organize long Ethernet runs — especially if they go through walls, floors, and/or ceilings. Patch panels make cable management and network organization very easy over long periods of time, but you'll need to. Patch panel and switch are commonly used to connect devices in data centers and telecom rooms, and they are usually mounted on a server rack. Patch panels aren't so difficult to understand but might be a little intimidating at first if you're new to structured wiring. Following these steps helps you build a clean and efficient structured cabling system that simplifies maintenance and maximizes network performance. Before a single cable is.
[PDF Version]
-
How to tell the positive and negative terminals in your home s electrical panel
According to master electrician James Hornof, for DC power, the red wire is generally positive and the black wire is usually negative. The red wire is a phase 2 hot wire, and the white wire. When you're dealing with electrical wiring, it's important to know which is positive and which is negative—but how are you supposed to tell them apart? The easiest way to tell is by looking at the color, but the colors mean different things depending on what kind of power is being used. Whether you are replacing a fixture, troubleshooting a circuit, or simply trying to understand your home's electrical. The positive wire carries the current from the power source to the load, while the negative wire returns the current back to the source. To identify the positive wire, look for markings such as a plus sign (+), the color red, or words like “positive” or “pos” on the wire insulation.
[PDF Version]
-

How to easily thread cables through cable trays
The main cable tray connection methods include splice plates, bolted connections, quick connect systems, fish plates, clamps, and welding. Choosing the right one depends on project conditions, load. In construction, electricity, telecommunications, and urban infrastructure projects, the cable pulling method plays a crucial role. more. Article Summary: A compliant cable tray installation requires a thorough understanding of NEC Article 392, proper structural support, and precise installation techniques. Wire mesh basket trays are an excellent option for a flexible and efficient cable management system. We want each and every experience with our.
-
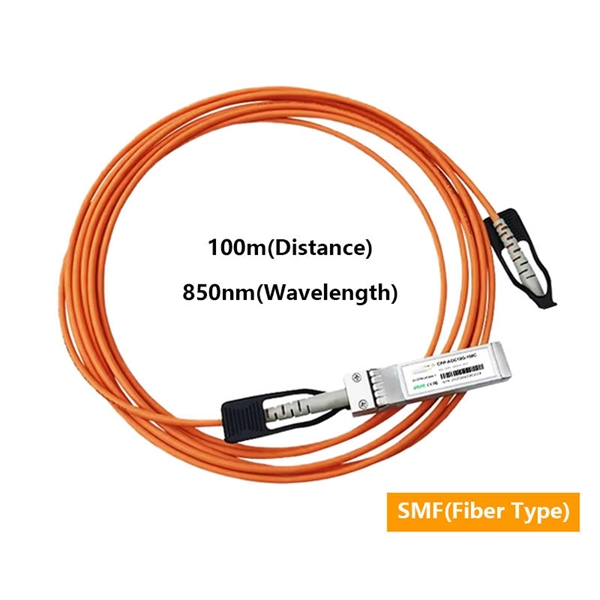
How to choose the fiber optic cable route
When choosing a fiber optic cable, consider factors like distance requirements, bandwidth needs, environment, connector compatibility, installation conditions, and future scalability. This comprehensive guide will walk you through the essential factors to consider when selecting fiber optic cables, helping you make an informed decision that meets your specific needs. They are manufactured with a core, cladding, and protective sheathing designed to maximize signal integrity and. Choosing the right fiber optic cable can feel overwhelming, especially with the myriad options available on the market today.
-
How much does a composite optical cable cost for home use
Prices vary based on the length of cable needed, installation method (aerial or underground), and labor rates in your area. Expect to pay $1 to $12 per linear foot, depending on project complexity and materials. Typical costs hinge on fiber count, indoor versus outdoor use, and whether trenching, splicing, or termination is required. This guide provides practical ranges in USD and practical price. We stock Composite Cable in a variety of gauge sizes. Labor dominates the installed price.